Smoked Trout at Harmon Lake

Smoked Trout at Harmon Lake
Making smoked trout while camping is easy and fun.
So, would you like to know the secret to great Smoked Trout?
A secret about how to make the best smoked trout in all of the world? OK, at least the best in Nicola Valley? I am about to share it here! Keep reading!
The Process
Teresa and Brad, camping friends I met last year here at Harmon Lake, have graciously shared their tips and techniques with me to share with you, the world!
Not only is this amazing to the tastebuds, it is a fun thing to do together with friends and family!
To make our Harmon Lake Smoked Trout you need…
- nice fresh trout that you had fun catching.4-6
- 1/2 C brown sugar
- 6-8 C water
- 2-3 C ice cubes (optional)
- 1/4 cup non iodized coarse salt, kosher salt, or just salt
- paper towels
- rubber gloves
- cutting board
- one strong large knife
- 1-2 fillet knives
- a good set of fishing bone tweezers!
- containers and/or ziploc bags for brining.
- Smoker
- smoker chips
- tray for air drying
- plastic wrap
The Trout
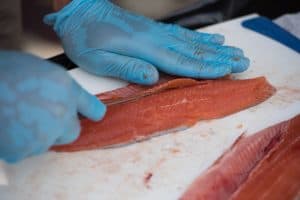
First things first! To make Smoked Trout, you need them! Catch them, buy them, ask your friends for theirs, it doesn’t matter. But you need fish! We happened to catch ours the day before! It doesn’t matter what size as you will fillet them and place them on the rack by size for best and even results.
The Process – Preparing the Trout
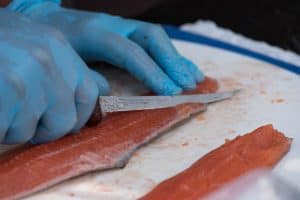
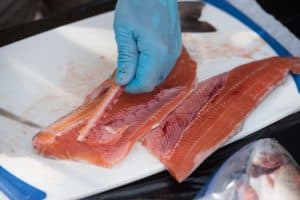
Filleting the Trout! Have the right tools to make this important part easy. Having the right tools from the get-go will make your learning easier and you fillets clean cut and “pretty”.
I watched as my friend masterfully filleted the trout and deboned them. She used a tool she purchased specifically for deboning fish, and it worked great. You could use pliers, but she said this tool was worth every cent!
Get started
Cut the head off first. then make a straight cut, across the fish, down to the bone near the tail. Starting at the cut. angle the knife on the fish and also angle the blade slightly up over the backbone and fillet away. Once you start to fillet keep the knife blade on the angle above the bone. With a clean smooth motion, filet the fish, keeping the blade just above the bone.
-
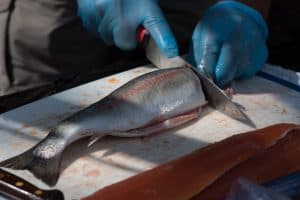
- Cut the head off
-
- Straight Cut near the tail
-

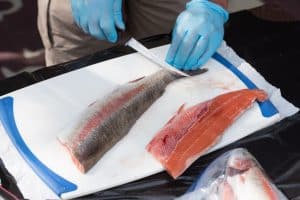
- Filet the Trout
-
- smooth pushing motion
-
- clean cut the edges
-
- One of my better ones
-
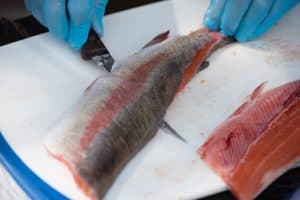
- Take out the inner bones
-
- Cut just below the bones
-
- Almost done!
-
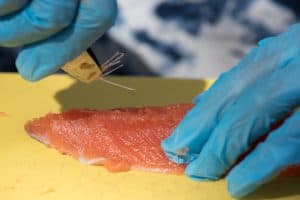
- Debone the trout
Keep going!
It may take some practice but when I did it it just took a few times and I was sliding the blade right up to the end. It really wasn’t that hard, just practice and a feel for it.
I learned that there is a technique and once you get the hang of it it becomes pretty easy!
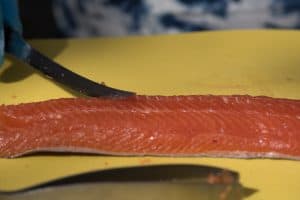
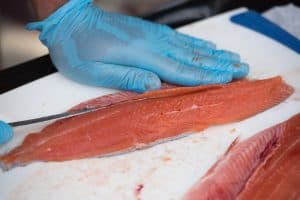
Once both sides are filleted, you can fillet out the inner bones. This is a bit tricky to explain but I will try! Take the tip of the blade and cut lightly under the bones about 1/2 inch in. Start over and repeat with smooth motions. Three or so cuts should do it. Cut that piece off the fish. Clean up the edges with a clean swipe down the edges. Voila! A Fillet!
Tips for preparing the Trout
- A good filleting knife will make the task easy and make your fillets look PRO!
- Use a paper towel under the trout on the cutting board to help stop it from slipping & sliding.
- Don’t leave your fish in water (in the cooler where they could sit in water for example) after they have been cleaned. they will get soggy.
- Keep the knife at an angle about 45 degrees with the fish.
- Once you start to fillet keep the knife blade on a slight angle above the bone on with a clean smooth motion, filet the fish, keeping the blade just above the bone.
- Leave whole or cut into proportions that you would give away.
- Practice.
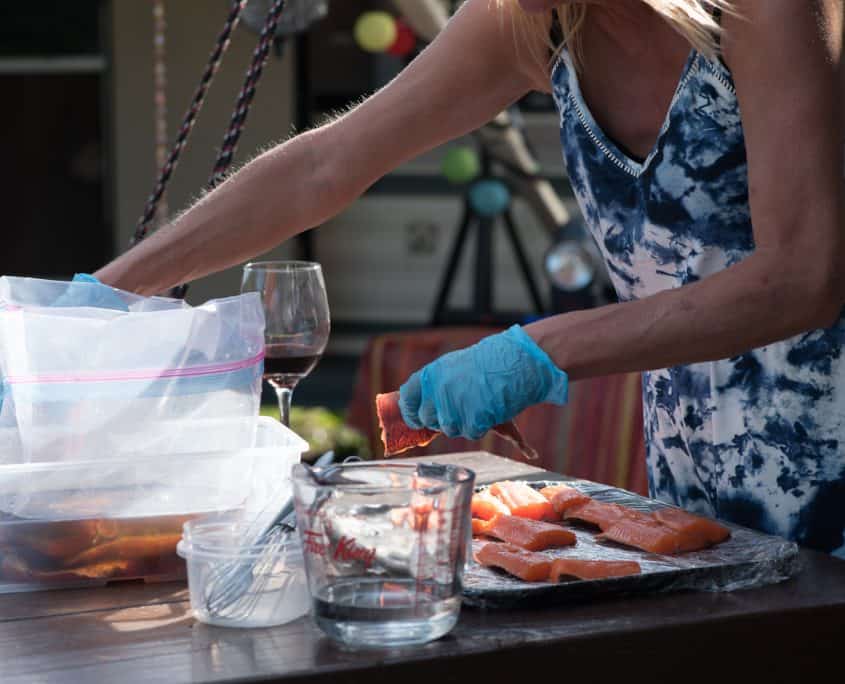
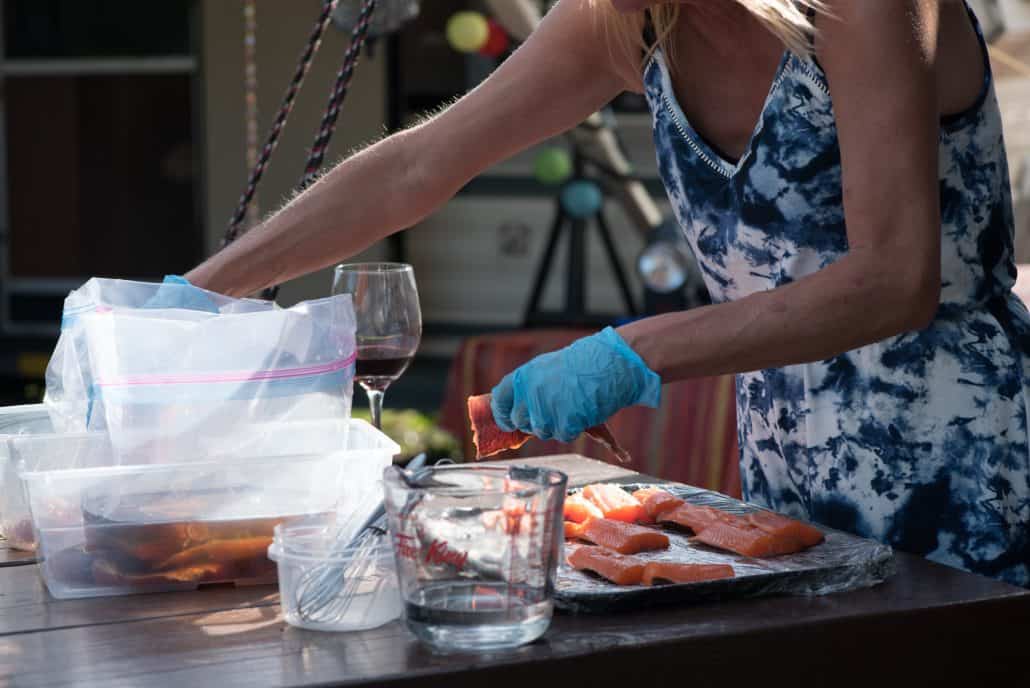
The Process for Brining the Trout
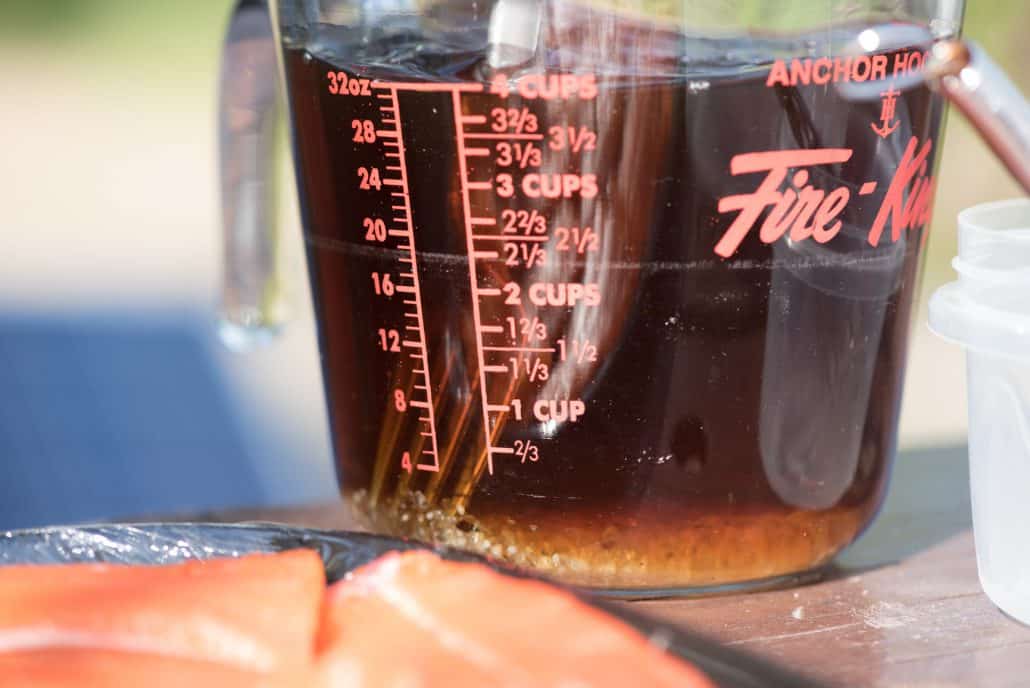
This is simple yet tricky, the right mixture of the the salt (and what kind of salt), brown sugar, along with the right amount of water and then the brining time! My friends secret sauce is 1 part salt to 2 parts sugar.
-
- Prepping to Brine
-
- Prepping to Brine
-
- prepping to Brine
-
- Taste test
-
- Brine away
-
- Brining
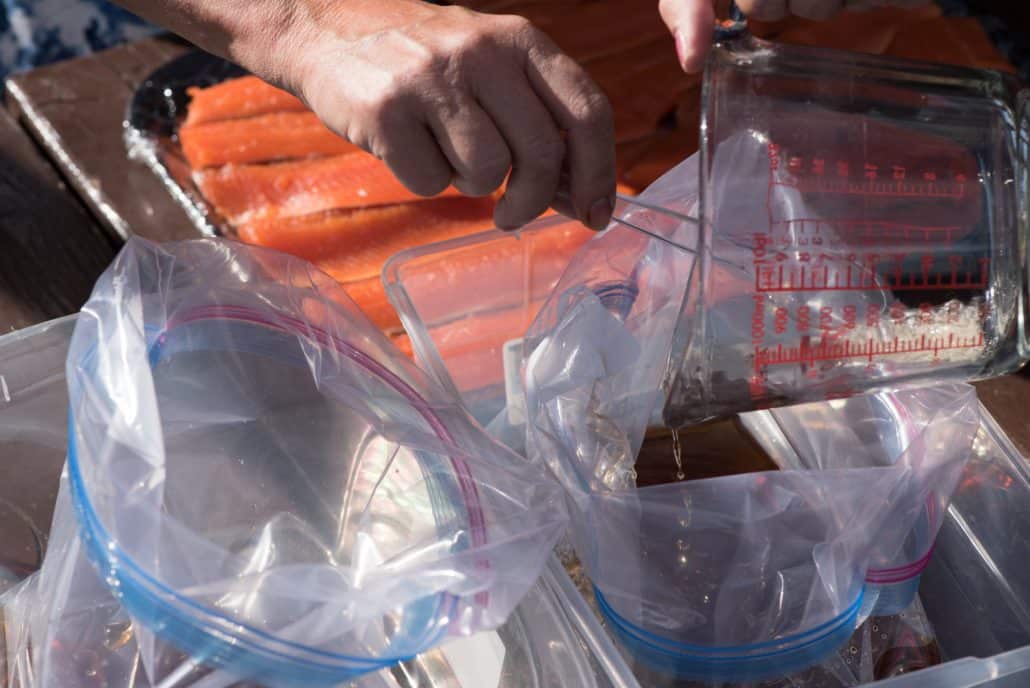
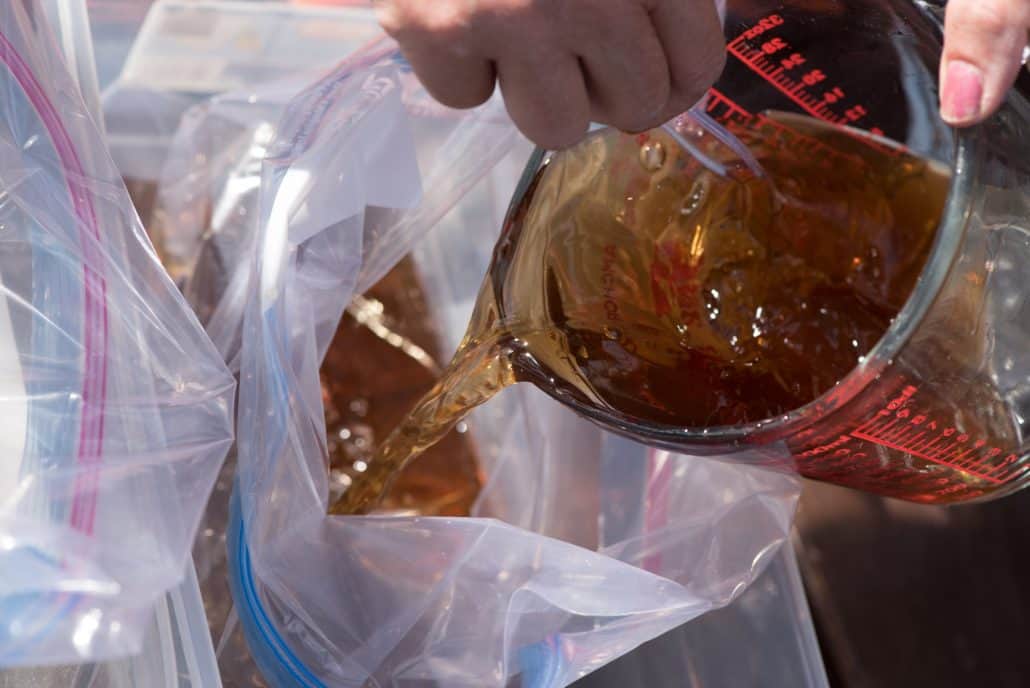
Dissolve the brown sugar and salt in 2 cups of water. Add about an additional 4-5 cups of water after you have dissolved salt and sugar. Taste test the brine. If you go “Echhhh! Too much salt!”, add more water and you could add some more brown sugar. You do want it to taste salty like the sea, but not so much that you can’t swallow it!
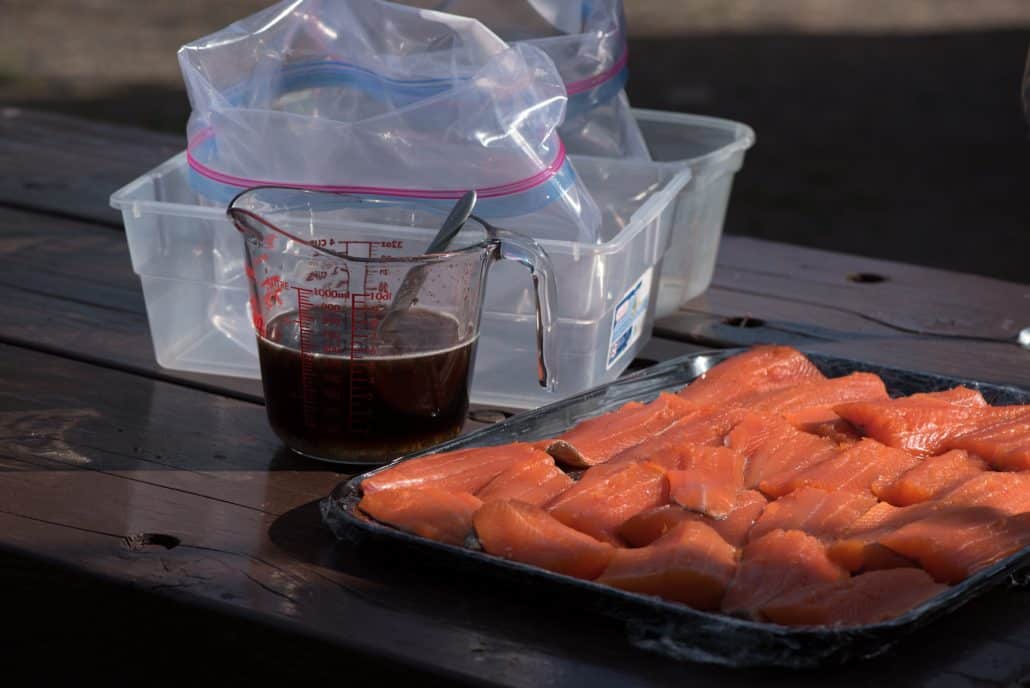
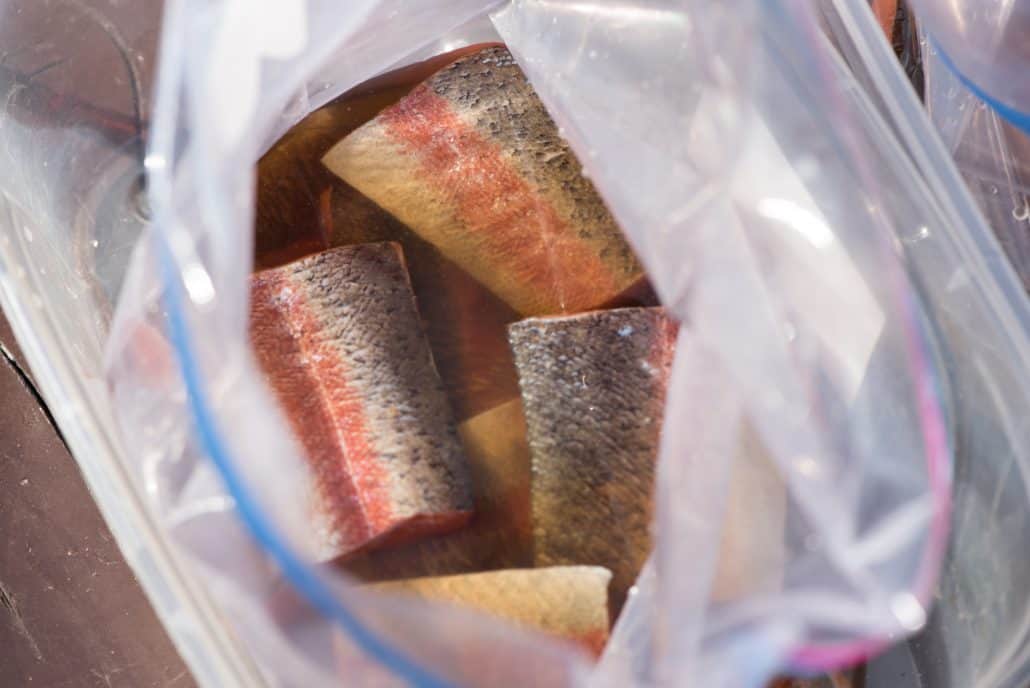
We used two extra large ziplock bags and and split the brine mixture in 1/2. Put the fillets into the bags. Seal the bags and refrigerate 2-3 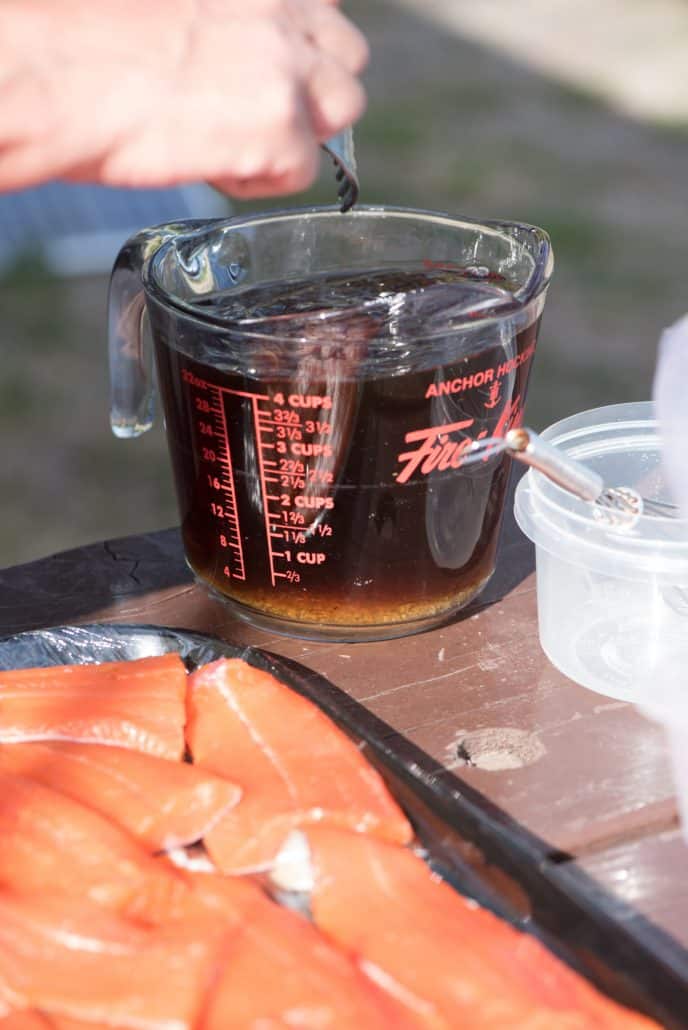 hours. More time for larger fillets!
Tips for brining
- You can experiment with different kinds of salt.
- The brine should be ice cold to work the best so add some ice cubes about 2-3 cups.
- Trout do not need to brine as long as other fish.
- Put the fillets in ziploc bags to brine and make sure the bags are sealed. Get as much air out as you can.
- Put the bags into a container that will fit in your fridge in case the bag leaks.
- Do NOT brine in a metal container! Use glass or plastic.
- The brine mixture proportions is the most important part and it will be different every time.
The Process – Smoking the Trout
Air dry the fillets on a surface of parchment paper or plastic wrap (never use metal) for about an hour.
Smoking time varies as does our weather! So you have to vary it each time. Wind and rain are not your friend for smoking fish. So let’s say its 70 degrees and no wind. Your smaller fillets should be ready in about 90 minutes. You can leave on the bigger fillets for an additional 1/2 hour.
We are using a Little Chief Smoker with alder chips, which pair well with trout!
The smoker is running from a 12 V battery and an inverter. We charged the battery with two 75 Watt solar panels. A generator works great too!
Tips for smoking the Trout
- Keep the smoker out of the wind.
- Keep the smoker off the grass as in the summer it can be too dry and dangerous.
- Line the bottom tray of the smoker with foil.
- Use non stick spray on the racks.
- Wipe the trout skin with a paper towel before putting on the racks for “less stickage”.
- Do not over fill the racks as you need the smoke to get in-between each fillet
- If you’re smoking some glazed with brown sugar, put the glazed ones on the bottom racks.
- Put the thicker fillets on the outside edges as the smoke comes mostly up the sides.
- Start timing from the time you see smoke.
- No 2 batches are the same ever!
How would you like your fish smoked? Mild, medium or well done?
- 2 hours for mild
- 3-4 hours for medium
- 5 hours for well done
The more fish on the trays the longer it will take.
When the Trout has smoked enough
Air dry for about an hour before removing the skin and refrigerating. Make sure the fillets have cooled down first. Best to place them on a paper towel and in a container or ziplock bag The paper towel is there to absorb any excess moisture. So, if you take them out of the smoker and they seem a little too dry, don’t set them on paper towels.
Teresa and Brad’s Philosophy: Keep it simple for best results! Particularly with trout as trout is so delicate!
Share and enjoy!
Moister or dryer, it’s up to you! When the trout fillets are smoked the way you like them, loosen from the rack right away or they will get stick to the rack. Take a picture and share! You earned the right to brag!
Then quickly put them away or they may just go missing. AKA, eaten all up!
That is how to make the best smoked trout in the Nicola Valley.
Trout, and other fish, have been smoked throughout history. Click here for some more information
Do you have special tips and techniques you want to share?
I would love to hear them! And see you at Harmon Lake!
Places To Stay in Merritt


I love this Julie. I am defiantly going to be trying this on this years summer camping trips.