BUILDING A TERRACED GARDEN
BUILDING A TERRACED GARDEN
TIPS FOR THE RESTORATION OF A GARDEN
PART 2 0F 2
In Part 1 of Building a Terraced Garden I had to leave you hanging as we ran out of blocks for our wall and couldn’t complete the project. We had Home Hardware scouring their network to see if they could find some. With no luck there we checked Home Depot, Lowes and Rona where we struck out in all cases. As a last resort we also looked on Market Place, Craig’s list and Kijiji.
Where for art thou bricks?
We were extremely upset because we had only a partial wall and no way of completing it. However, providence was on our side. One day my wife, Shirley, was out in the front yard when a friend of hers came by with her new neighbour. When Shirley mentioned our brick problem the new neighbour said her husband was taking down a brick wall and maybe we could use them. It turns out they were exactly the same as the ones we were using and therefore we could get started again.
Resuming Building a Terraced Garden
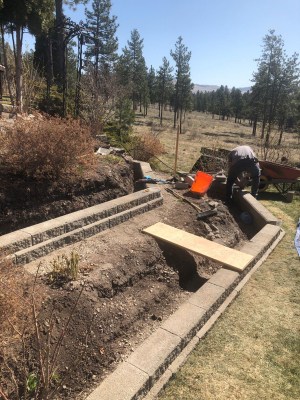
First Rows Photo Tom Reynolds
We got this far in Part 1 of Building a Terraced Garden. You will remember that we dug our trench, while making sure it was level, and finally added the gravel base. After that we then placed our first two rows of blocks and are ready for the next step.
Our garden will have a sprinkler system so we have to be sure that we have a system that will move excess water away so that the walls don’t get undermined. The first step is to lay the drain fabric up the side of the wall and with enough fabric on the other side so that you can wrap it back over the pipe after you have added the drain rock.
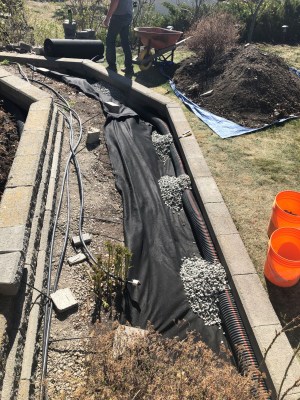
Pipe with drainage rock photo Tom Reynolds
The walls go up in building a terraced garden
Once the drainage is dealt with, the next step is to continue with adding the next rows of blocks. The tricky part of our construction was the number of corners we had. To handle this you need a cement cutting saw for doing the rough cuts (a Quick Cut Saw). Also another for doing the finer details. You can rent the quick cut saw. Fortunately our contractor, Ted, had the other saw.
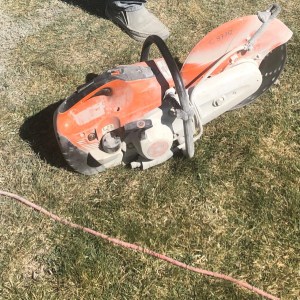
Quick Cut Saw photo Tom Reynolds
The Blocks are finished
Shirley and I carried almost two hundred blocks for this phase which brought the restoring of the terraced garden to an end. The next task was to fill the terraces with great top soil. We got ours from High Mountain Ventures.
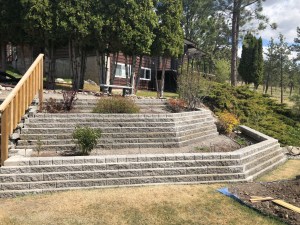
Finished Wall photo Tom Reynolds
The Final Phase of Building a Terraced Garden
In order to finish our project we had to take the plants from the ICU and replant them in our restored garden. Once this was done we could place our inground sprinkler system so all the plants would receive a drink.
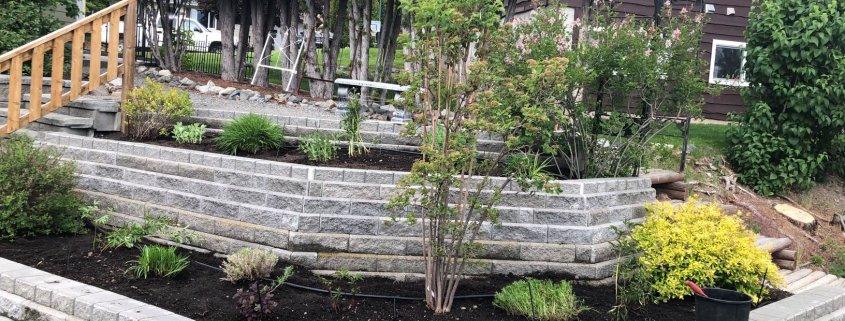
Finished Project photo Tom Reynolds
Just as humans who come out of the hospital’s ICU don’t look great, neither did our plants. H0wever with the nutritious soil and watering we expect the garden to show well soon.
What did we learn about building a terraced garden
Planning is important. We had a vision but did not think it through because we only started with about 150 blocks and if we planned properly and recognize that going from 5 tiers to 2 would require higher walls and therefore more bricks we may have been able to avoid our dilemma of running out of blocks.
We didn’t notice until the project was complete that we would have to move one of the sprinklers because the new walls were too high and blocked the water stream.
Our project turned out well because we used a great contractor, Ted Cederland, for the important parts of the job.
BUILDING A TERRACED GARDEN
TIPS FOR THE RESTORATION OF A GARDEN
Nicola Valley Travel and Tourism Guides

|
“Experience Community Program” is a small and rural community authentic content marketing program. It is a product of the EH? Canada Marketing Group. Contact us today to bring this award winning community program to your region.
- Snowshoeing near Merritt BC Canada - January 4, 2023
- Wedding Anniversaries - November 13, 2022
- Nicola Valley Food Bank - July 28, 2022






Leave a Reply
Want to join the discussion?Feel free to contribute!