Merritt, B.C., seniors repurposing furniture
I like today’s weather forecast- snow; and tomorrow’s- more snow!
The choice
As one of our Merritt, B.C., seniors repurposing furniture, I decided to cook up some chicken and dumplings and use the next couple of snow days to work on one of my furniture projects. I keep trying to make time to renew a small, decorative shelf. Want to follow along with your own project?
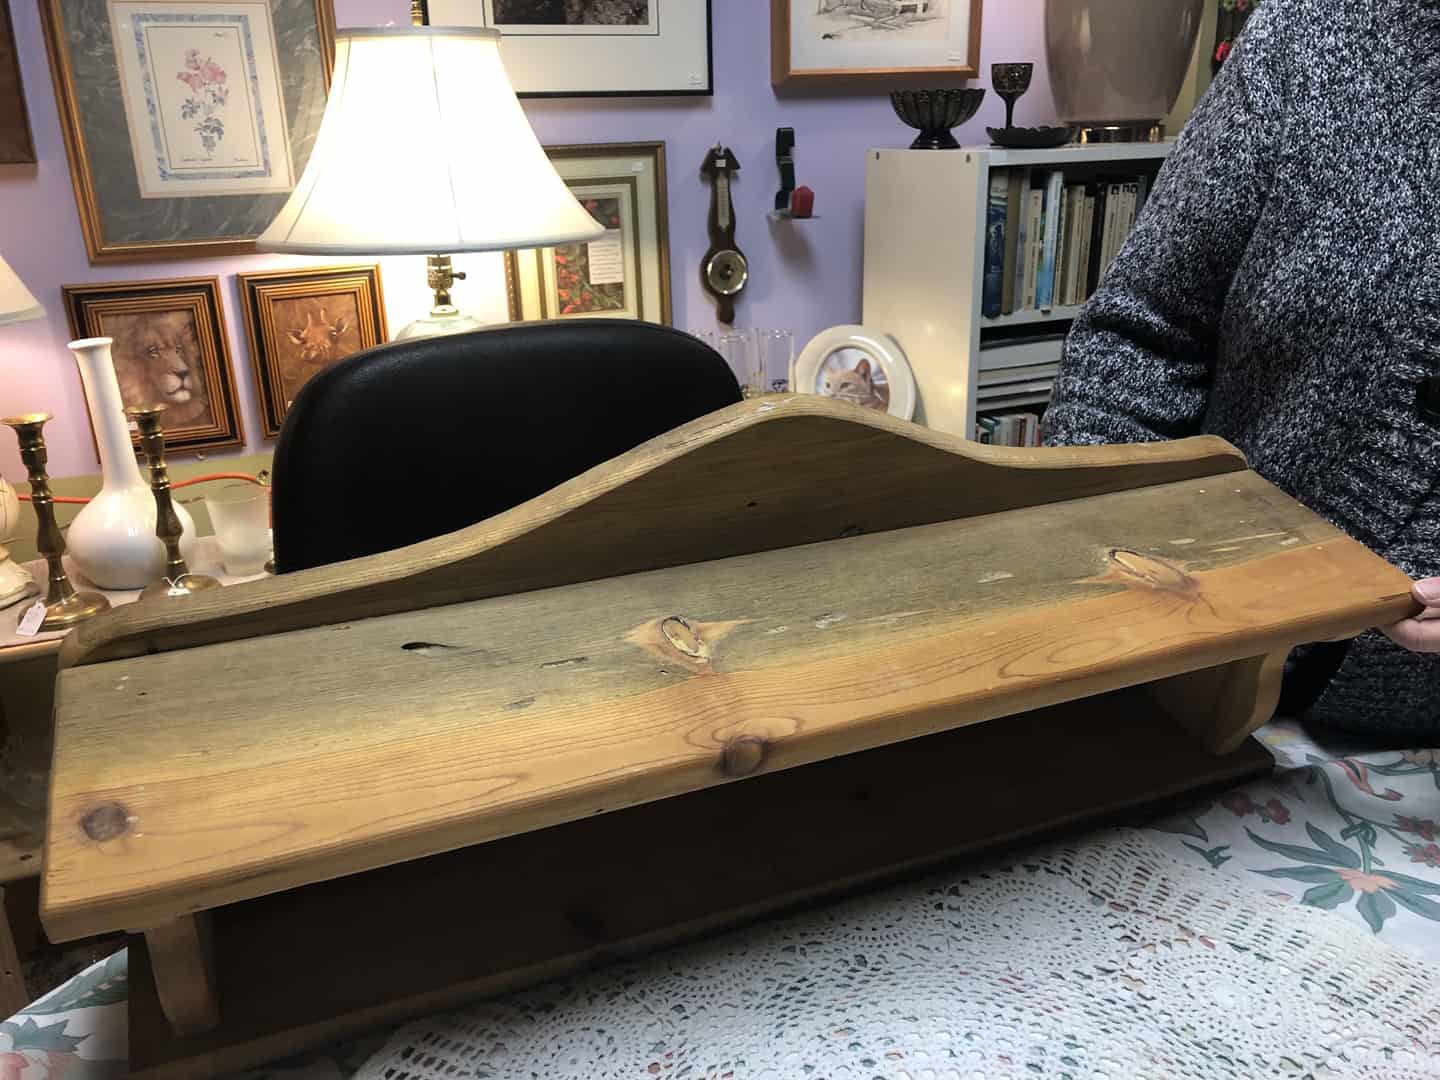
The original piece
Step1- wash the shelf
The first thing I did was wash the shelf. If there is any grease or dirt left on your project, you are only giving yourself potential problems by skipping this step. T.S.P. will clean dirt and grease off most things quickly and easily. Rinse well and allow the piece to dry. Do not soak wood items!
Although water raises wood grain, this is not a problem because we will sand the piece before priming it.
Step 2- fill cracks and holes
The next step is to fill any cracks, holes or imperfections. I chose a quick- drying wood filler and applied it with a metal spatula. Both are available at most home improvement stores around town. Since I live close to Home Hardware, it was easy for me to get all my project supplies there.
I spoke to Clara Moyes at Home Hardware after getting really good help (as always) from some of the other staff. I asked her what makes Home Hardware different from their competition. Her reply?
“It’s the customer service!”
She is so right! Great service all the time, every time.
If there are any deep holes, and this project had several, I partially fill them and allow the fill to dry. Then, I fill them the rest of the way. Trying to do this in one step only leaves the fill inside the hole still moist and subject to cracking. If you are a Merritt, B.C. senior repurposing furniture, you know it is worth the extra time it takes to do it right!
Step 3- sand it smooth
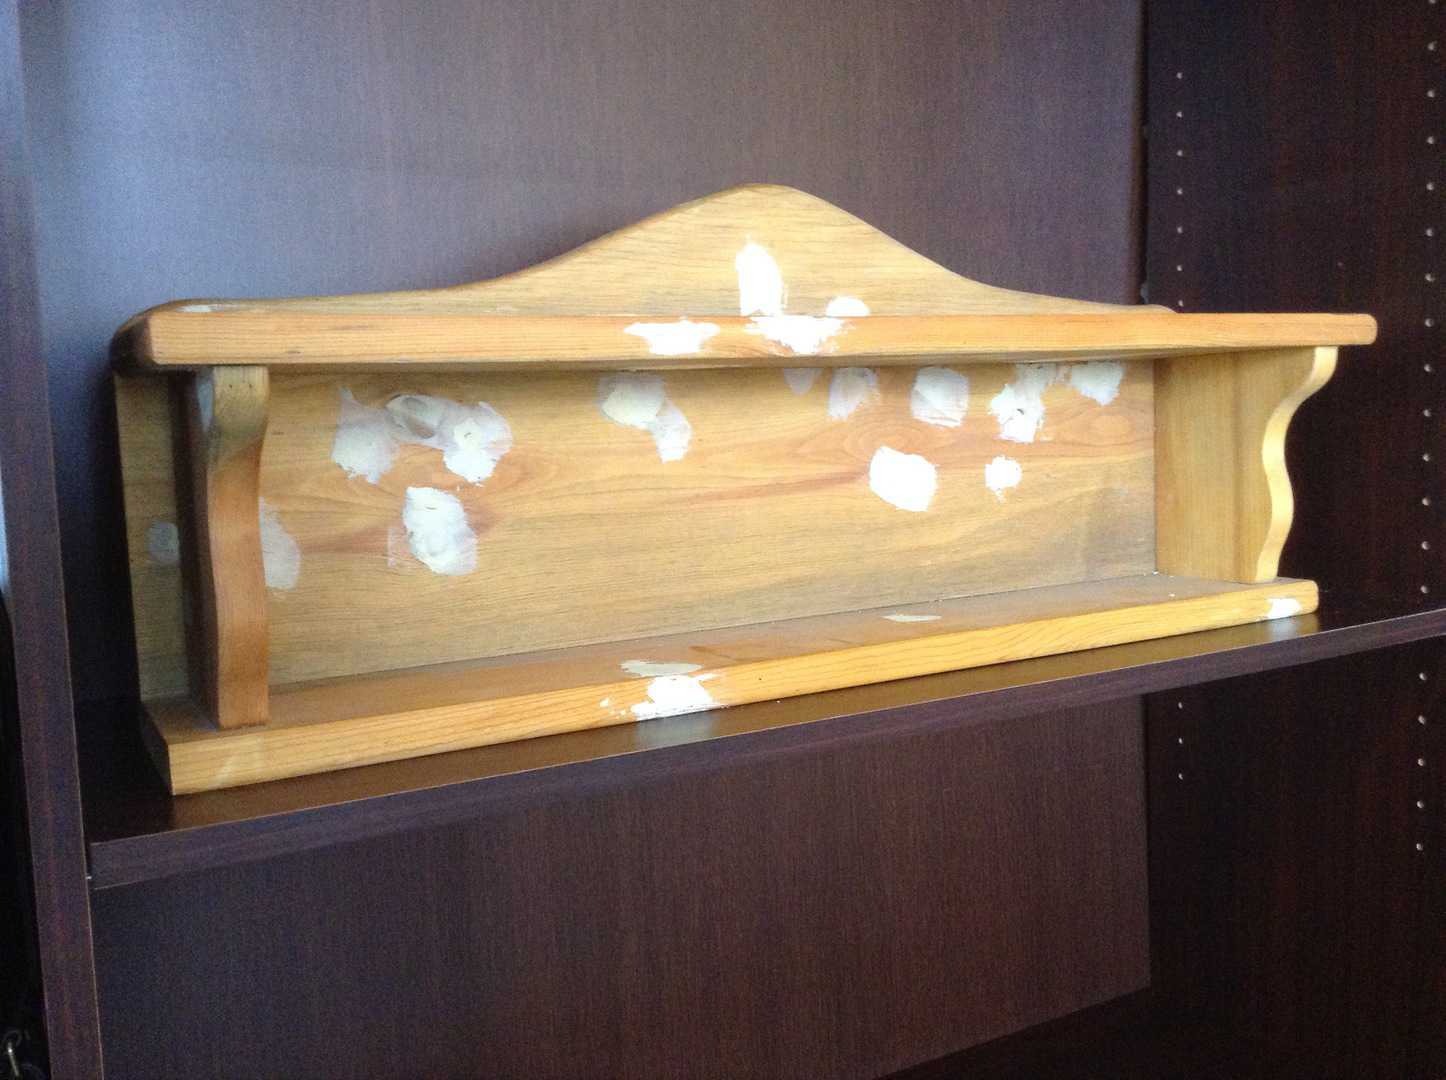
Filled and sanded
Now comes the messy bit. Please, everyone, use a dust mask for this step! I have a little electric sander that has a dust catching bag attached. Although I love it, it doesn’t get into all the tiny places. I still need to use a sanding block (and a dust mask).
As a Merritt, B.C. senior refinishing furniture, I have a nice collection of sanding blocks, both home made and store bought. I have used them for years. Whichever sander you choose, use sandpaper made for your project. Choose a 100 to 150- grit paper. Sand your project well. Dust it off with a dry rag if you are using a water- based primer, or with a tack rag if your primer is oil based.
Step 4- prime the project
So far, so good! Now, my fellow Merritt, B.C. seniors repurposing furniture, it is time to prime the piece. In my case, there were quite a few knots in the wood. When you have this situation to deal with it is a good idea to prime the knots first and let them dry before then priming the whole piece. Use a stain killing primer such as “Kilz”. If there is any sap left in those knots, the extra layer of primer will prevent it from “bleeding” through the paint and spoiling your project.
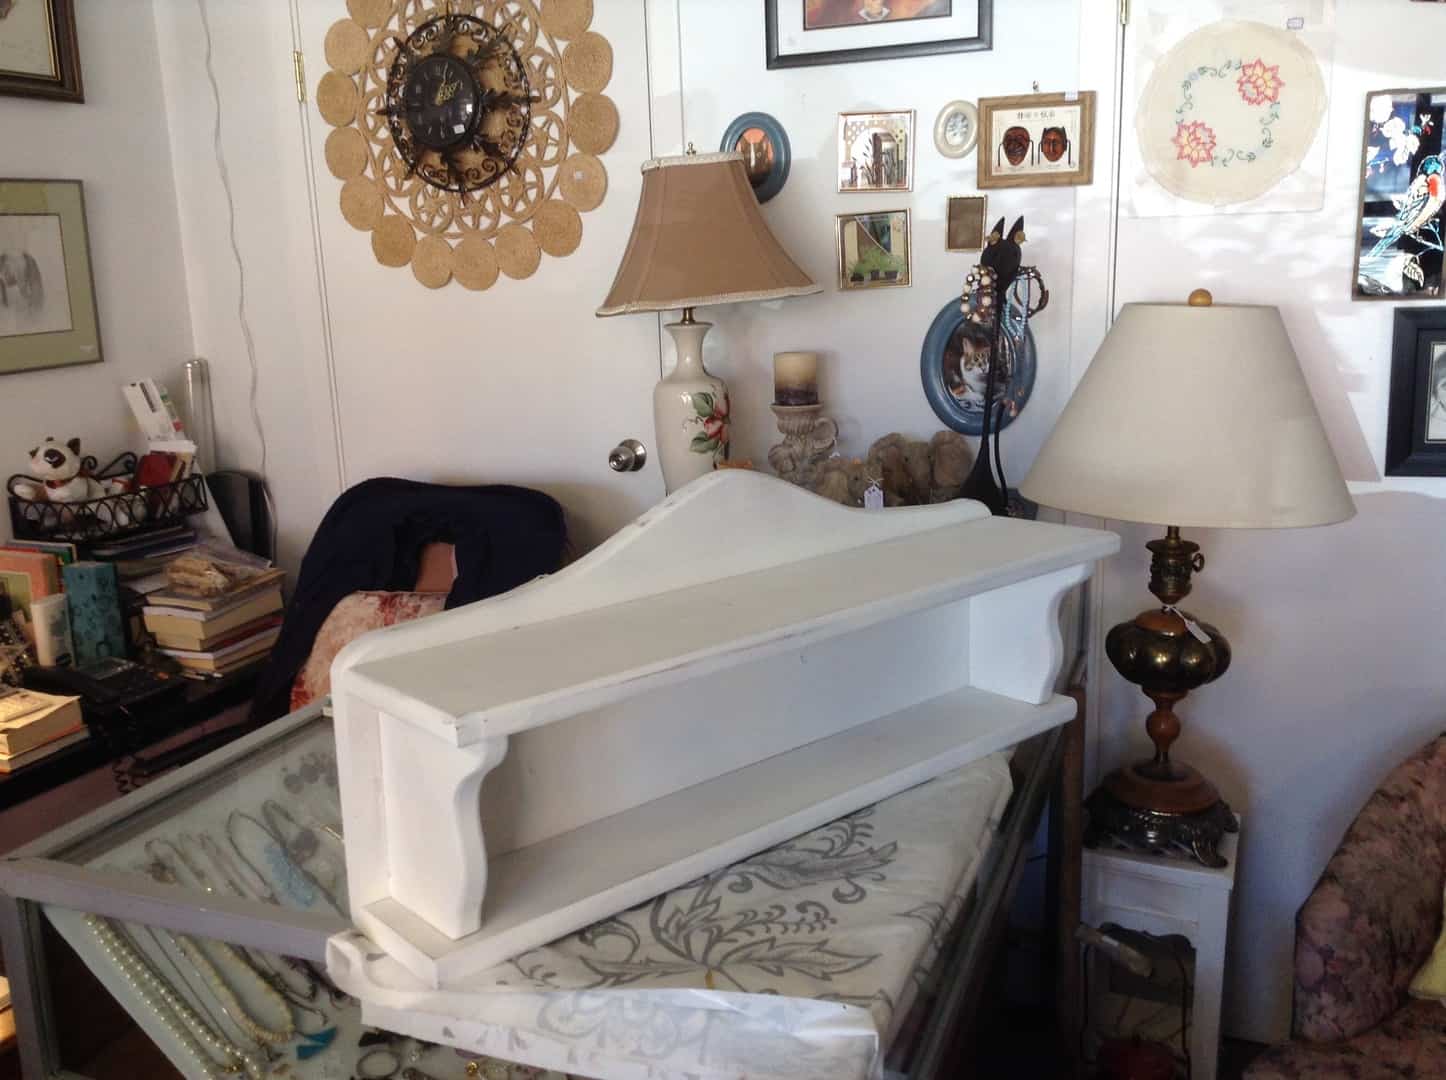
Primed and ready to paint
Step 5- paint
This is the rewarding part. By now you have chosen your colour. I decided on paint (a soft mauve colour). Because the holes and knots in the wood required a lot of filling, trying to stain so much spotty fill would likely leave me with a hot mess! Later I will hand- paint some leaves and flowers on them (maybe).
The easiest way to paint a small project is to just spray it. On a small project like mine, one can is all you will need. Spray paint gives a nice, smooth finish, covers well and dries quickly. In warm weather you can take your project outside to spray it. In winter, see if you can score an appliance-sized box and use it as a spray booth for small projects. Be sure to wear a mask and ventilate the room. Two or three light coats of spray paint and the job is done!
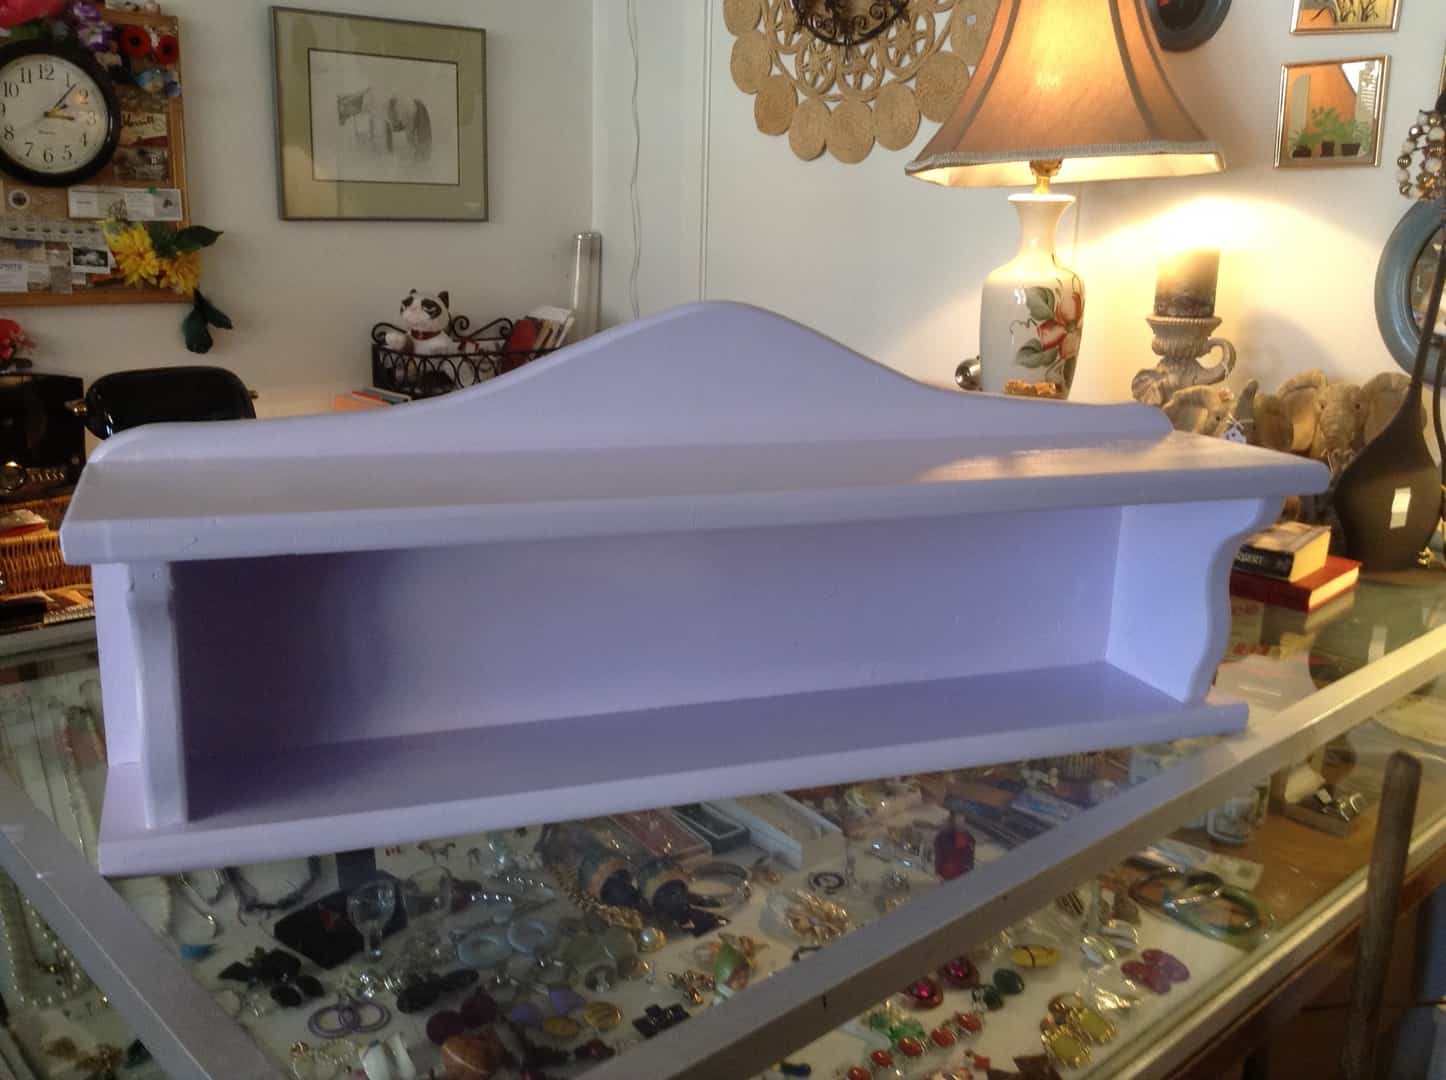
All done!
Step 6- protective coat
If you want your project to have extra protection, it is very easy to spay it with a clear varithane. Today’s varithanes come in several sheens so ask the paint experts to help you choose one that suits your project. Be sure to let everything dry well and give it a week, or better yet two, before subjecting it to heavy use.
Now enjoy being one of our Merritt, B.C., seniors repurposing furniture!
Conclusion
I am the proud owner of a refinished (and repurposed) shelf. It sure is great to be a Merritt, B.C. senior repurposing furniture! Also, this is an inexpensive way to get “new” stuff for yourself.
How did your project turn out? Send some photos and share it with us. Show off what you can do!
Merritt, B.C., seniors repurposing furniture!
Your senior blogger,
Diane
.