Tag Archive for: gardening

Mason Bees in Merritt BC

Bees in Merritt BC are some of the best friends your garden can ever have.

Mason Bees in Merritt BC – These solitary, non-aggressive little bees are not only great pollinators but also just one nest of them is more than enough for the average back yard in Merritt BC Canada.  And when I say they are non-aggressive, I mean it! I have never heard of anyone ever being stung by one. In addition, Mason Bees in Merritt BC are abundant. To attract and also to keep these nature friends in your garden, you need to know a few things.

Life Cycle Of Mason Bees in Merritt BC

Mason Bees in Merritt BC emerge from cocoons when the daytime temperatures reach 14 degrees C(57 F). They mate shortly after emerging. Then, immediately after mating, the female starts foraging for pollen to provide her nest. She goes into a tube about 15 cm  (6″) long, creates a pollen lump, lays an egg on it and then seals it with mud, plant material or a mixture of both. Each egg hatches out into a grub or larva and feeds on the pollen lump until it is fully grown. Then it rests before spinning itself a cocoon. Inside the cocoon, it first changes into a pupa, then into a bee.
By the end of summer, the cocoons contain adult bees. Both male and female bees remain in their cocoons until spring when the cycle starts all over again.

mason bees in merritt bc

Mason bee hard at work pollinating

Mason Bee Nest Requirements 

If you want to encourage Mason Bees in Merritt BC, build them a nest and meet their few requirements. They like their nests about 5 ft. from the ground and facing east. Preferred nesting spots are in dry tubes about 6″ long and 5/16″ deep, with only one entrance. Wood, masonry or even paper will do. It must be protected from wind, rain and extremes of cold and heat. Also, early flowering plants are also essential for bees in Merritt BC since the female must provide pollen lumps for her eggs. In addition to these few things, your Mason Bees will also need mud to seal in their eggs and protect them.

Early flowering plants for your Mason Bees

I checked with Vicki Hansen at Petals & Plants Flower Shop at 2052 B Quilchena Avenue for some suggestions for early plants in our area. She suggested the following: bleeding hearts, bachelor buttons, snowdrops, crocuses, daffodils and, of course, lilacs. If you need more information, contact Vicki on Facebook, Instagram or phone her at: 250-378-5575. 

merritt mason bee pollinating

Spring is here and Mason Bees are hard at work

Constructing your own Mason Bee Nests

The easiest way to do this is to purchase paper straws, crimp the ends and tape them together so the open ends are uneven. Next, wrap the taped straws with cardboard glued together, then wrap in insulation to protect them from heat and cold. Paint the bee house in bright colours. Bees see colour and this helps them to find their nest. While you’re at it, why not paint the ends of the straws too.

Securing your Mason Bee nest

Paint the inside of a large, plastic bucket a dark colour. Insert the straw bundle in the bee house and put the whole thing into the plastic bucket turned on its side. Drill holes on the under side to let out water if rain gets in. Mason Bees in Merritt BC have many predators, so remember to cover the open end of the bucket with chicken wire. Also, keep the wire at least 3″ away from the nest entrance to keep pests out.

nesting mason bees in merritt bc

Example of a home-made Mason Bee nest

Harvesting Mason Bee cocoons in Merritt

Sometime between October and December it will be time to harvest your cocoons. If you use paper straws for your nests, harvesting is easy. Make a small cut in one end of the straw and unravel it carefully over a paper covered surface. Place cocoons in a container.

Merritt Mason Bee Nest and cocoon cleaning

Clean nests and replace straws as previously described. Between late September and December bees will not emerge from cocoons at room temperature, so clean the cocoons then. Mason bees in Merritt BC have a lot of wasps that parasite  them. Because of this, a thorough cleaning is necessary.

mason bee hotel

Mason Bee hotel and accommodations

How to clean Mason Bee cocoons

Place cocoons in an ice cream bucket. Add 8 cups tepid water. Wet cocoons by gently rolling and moving them for 5-15 minutes. Remove and place in a large strainer. Rinse again adding 1 tablespoon bleach to 1 gallon of water. Rinse well under gently running water. Remember, you have delicate, live bees in there.

After at least two washings, check for mites by placing the cocoons on a white paper towel, cover them with a wet paper towel and leave them to drain.

Mite check for your Merritt Mason Bees

After an hour, remove the paper towels and check the cocoons. You are looking for small orange spots. These are mites. If there are 5 or fewer per square inch, your cocoons are OK. If there are more than this then wash your cocoons again until there are fewer than 5 orange dots per square inch.

Which cocoons have  Mason Bees in them?

Cocoons with bees are dark grey and firm to the touch. “Parasitized” cocoons are lighter colored and feel crispy or look empty. Keep suspect cocoons in a clear container. In spring if wasps emerge, freeze and destroy. If bees emerge, cool them for 30 minutes in the fridge and release them outside.

Now you have Mason Bees in Merritt BC . Store the dry, clean cocoons in a cardboard box cushioned with toilet tissue. Keep the box in a metal, lidded container so pests can’t eat the cocoons. Punch some holes for air.

Releasing your Bees

In February, keep the box in the fridge over a damp paper towel until flowers bloom and the bees have food. A temperature between 2-4 degrees c. is ideal but colder could kill them; warmer could cause them to emerge too early and starve.

Emergence of Mason Bees in Merritt

Cut a small hole in the box for the bees to emerge. Then, place under the cleaned nesting box protected from rain, wind and of course, birds. However, remember to provide mud for your Mason Bees.  Also, remember to keep it moist so the bees can scoop it up as needed.

Smile every time you see one of your bees foraging in the garden!

Need more information?

Check out our local Merritt Public Library
address: 1691 Garcia
phone: 250-378-4737
website: tnrl.ca

Your senior blogger
Diane

Mason Bees in Merritt, B.C.

Creating a home for your Merritt Mason Bees


Merritt British Columbia Canada Top Travel Guides

Petit Creek Lavender Farm

Petit – which is pronounced “petee” Creek, Merritt, BC, Canada

“… remember the girl who grew a whole big country dream because she loved the smell of her Grandmother’s suitcase.”

Petit Creek Lavender Farm isn’t just about farming. It is about friends, it is about family, it is about fun, and it is about “following your heart”.  When I asked Judy-Sue Suzuki why she started the Lavender Farm in the Nicola Valley she said,

“ I started the Lavender Farm because I love it, and it gives me wonderful memories of my Grandmother’s luggage. When she would visit it smelled of Lavender”. 

Dreams Of Petit Creek Lavender Farm

Judy -Sue had a dream and since 2010 Judy-Sue and her entire family, her parents, her husband, her children, and her grandchildren have all played a valuable role in the production of Lavender buds, sachets, honey, creams, soaps, wreaths, and so much more. Everyone  is happy to pitch in to help with the acres of Lavender, over 300 rose bushes, gardens, rock beds, small quaint sitting areas and sweet cozy cottages. Every single inch of this property is touched by love. 

Petit Creek Lavender Farm

Everyone loves the Petit Creek Lavender Farm. Through the years the flowers and family grew.

Judy-Sue offers classes to teach others how to use Lavender in many ways, the farm has provided more than one wedding couple an amazing place to share their vows and start their new life together. But it is not all about making things pretty at the Petit Creek Lavender Farm. It is about work, hard work, long days and the only reward Judy-Sue is guaranteed to get is knowing she has done her best for her family and her animals, and for her that is more than enough. There are over 3200 photos on the Petit Creek Lavender Farm Facebook Page, I chose this one to share on my blog. Why? Read on!

experiencemerritt

Praying or Thanking?

Praying or Thanking.

Nothing To Waste 

I looked at this photo and it said so much. At first I thought Judy-Sue was looking up and saying a prayer, but then I also thought she could be looking up and saying “Thank You”, for the blessings she has in her life.  24 hours a day Judy-Sue watches over her farm in Merritt, BC Canada, hundreds of animals and birds are in her care. She also raises sheep, bunnies, and goats for fibre which she hand dyes and makes wool.  Nothing is wasted on the Petit Creek Lavender Farm, no land is left bare and unused, food is grown and preserved for the long winter. Birds lay eggs and provide meat, even the tiniest of creatures are trusted in Judy-Sue’s care. 

Lavender Farm in Merritt BC

Baby Birds in the Nest

Lavender And Heaven

It is so much more than Lavender, everyone shares photos of Lavender, we all know what it looks like and smells like. We love Lavender of course, but spending the day at the lavender farm in Merritt, BC, Canada is so much more. It is an experience your heart will remember forever. When you pull up to the front gate you will know you have arrived at a small piece of Heaven.

Petit Creek Lavender Farm

Arriving at Heaven’s Gate

Merritt Country Dream

When you meet Judy-Sue Suzuki you will understand what I mean. You will see a beautiful women with a heart the size of her 54 acres of flowers, fruits, family, and friends. Her smile will stay with you always. When you think of the sweet Petit Creek Lavender Farm in Merritt, BC, Canada you will always remember the girl who grew a whole big country dream because she loved the smell of her Grandmother’s suitcase.

Merritt BC cottage

Cozy Cottage at Lavender Farm

CONTACT INFORMATION

Facebook Page

Sunflower Farm

Merritt BC Lavender Farm

Petit – which is pronounced “petee” Creek, Merritt, BC, Canada

How to Create a Forest Garden

Living with the land

“Provides great nourishment for you and your family”


First, let me tell you what a forest garden is. A forest garden is a very old way of creating a low maintenance system that meets human needs by planting gardens that copy the natural structure of a forest.

Layers of a Forest Garden

There can be as little as three or as many as seven layers to a forest garden. They are quite different than a traditional garden. You don’t have to till the soil or worry about weeds. Depending on space, you can do three main layers of trees, shrub and soil surface or root. With more space you can do a full seven-layer edible forest garden. The layers are;

1 – Canopy Tree Layers (Large fruit and nut trees)

2 – Low tree layer (dwarf fruit trees, dwarf nut trees)

3 – Shrub layer (currants and berries)

4 – Herbaceous layer

5 – Soil surface layer (ground cover crops)

6 – Root layer

7 – Vertical layer (climbers and vines)


seven layers forest garden

Seven layers of a forest garden

Designing your forest garden

When designing a forest garden, you want to understand a few basic principles. They will allow you to plan what you need in the space you have available. Usually forest gardens are comprised of perennial species, thus allowing for less maintenance and more productivity, although you can use some annuals.

forest garden design

Drawing of my forest garden so far.

Other Crops

Depending on what your plans are, you can also plant medicinal plants. These may include eucalyptus, St. Johns Wart, balm and nettles et cetera. Other possible crops you can add would be different types of plants for crafting, like willow, bamboo or building material, firewood or wood to use for smoking meat. 

Layers of a Forest Garden explained

Let’s dive into the different layers of a forest garden and what are some examples of the different types of crops you can add to each.

Canopy Tree Layer

The first layer is the tall canopy trees. “When planting full size fruit and nut trees, be sure to plant them with enough space for them to grow. As well, you need to make sure there is enough room for light to come through once they are fully grown. Apple, peach, plum, and some species of nuts are good ones to start with.

Low Tree Layer

The second layer of a forest garden consists of a low layer of trees. This layer can be dwarf fruit trees or some species of nuts that grow lower than full size fruit and nut trees.  Apricots, peach, nectarines, hazelnuts and almonds are all naturally small trees. Any would make good choices to add to your garden. Nitrogen-fixing trees are also great for supplying mulch and compost. They grow quickly and can be heavily pruned. You can check at your local garden center to see what dwarf trees they have for your area.

Shrub layer

The shrub layer should have some different shrubs and smaller type plants. Some great examples are blueberries, bamboo, butterfly bush, raspberries, blackberries, currents, gooseberries et cetera.

Put sun-loving plants at the edge of the forest garden where they will receive the most sun. You want to plant mostly perennials, but you can still add some annuals and self-seeding species

shrub layer of a forest garden raspberries and blackberries

Part of my shrub layer with raspberries and blackberries.

Ground Cover Layer

Next is the ground cover layer. You want ground-hugging plants such as strawberries, creeping thyme, phlox, verbena, nostrum and clover. This layer is important for helping to keep the weeds at bay. Culinary herbs, vegetables and cover crops are great for mulch as well.

Vine Layer

The vine layer can be grown up the tall and dwarf trees. This creates a great use of space by using the taller trees as a ready-made trellis. There are a variety of vines that would work great. Kiwi, grapes or hops are just a few. More decorative choices could be English Ivy, wisteria, and honeysuckle. You can also train raspberries and blackberries to grow up although they will need help staying in place. I am also going to try planting some peas and bean vines to see how they will turn out.

The Last Layer is the Root Layer

There are several easy to grow plants that can be used as a root layer. Some of the ones I plan to try out in my forest garden are potatoes, onions, beets, garlic and carrots. I may even try some sweet potatoes and yams.

Benefits of a Forest Garden

There are many wonderful benefits of a forest garden. Not only will it provide great food and nourishment for your family, it can also provide attractants for pollinators and woodland creatures. Once it is more established it can be a wonderful place to go and relax. You are working with the land and not against it. You can yield a wide variety of products with very low maintenance. Helps to keep the land from eroding and also helps with winter run off. There is very little to no greenhouse gases and it promotes biodiversity. Besides all that, it is very pleasing to look at and to wonder your way through. 

My Secret Garden

Throughout my years of growing up I have seen a lot of amazing gardens. We used to travel to England almost every summer. They have some of the most amazing and beautiful gardens. Then watching The Secret Garden, I knew that one day I wanted to create one for myself. A forest garden isn’t quite the same in it doesn’t have walls and a locked gate. You don’t really worry about weeds and it’s not in rows. You also don’t have things planted in the same area. It will have a bench and maybe even a swing. It will be my little oasis to get away and relax. The best part is that I can nibble on whatever I please while I am relaxing on the bench.

Space needed to create a Forest Garden

The wonderful thing about creating a forest garden is there is no hard and fast rule on the space needed to do so. You can start one right in your own back yard on a small lot or an even bigger one if you have an acreage.  Some have done a forest garden in a 50 square meter area and others in 1000 square meters or more. If you are doing a smaller space just omit some of the taller layers. Use the space you have available to you and plant the layers according to what you can fit in that space.

The Beginning

At first it was just a space where we decided to plant some fruit trees. I didn’t know anything about forest gardens. While researching different ways of gardening, I came across an article on a forest garden. It really intrigued me to see all these different plants working together to create this amazing little ecosystem.

From that moment on it was decided. We were going to create our own little forest garden.

Although I have only just started my forest garden, I am looking forward to watching it grow. Last spring, 2018, I planted three fruit trees, five blueberry bushes, two raspberries, one blackberry and two Saskatoon berry bushes.  Unfortunately, I didn’t protect my Saskatoon berry bushes and my goats ate most of them. I have since taken them out to try and save them. In their place, I have planted two rhubarb crowns. I re-potted the Saskatoon berry bushes and have put them in the greenhouse in hopes that they will come back.

forest garden beginning

The start of my forest garden.

If what I planted last year survived the winter I will plant some ground cover crops and root crop. Strawberries, Jerusalem artichokes and even some herbs will be going in as soon as the weather warms up enough.

Another addition to my forest garden is a drip irrigation system. I have it attached to a timer, so I don’t have to remember to water. Also, if I need to go away for a few days or even a week, I am not worried about my garden drying out.

Kootenay Permaculture

The Forest Garden at Spiral Farm was started in 1993. If produces an abundance of fruits, berries, nuts, medicinal herbs and fiber crops such as willows and bamboos. It is located in the Slocan Valley on a 10 acre farm. Kootenay Permaculture was created to research and provide education in Permaculture and ecological living. It was started in 1991. It is an amazing example of what you can do to create a very productive Forest Garden. If you are interested in taking a Design Course in Permaculture get a hold of Spiral Farms. They have been offering a course annually since 2002.

Pictured below is a 20 year old Forest Garden from Kootenay  Permaculture. It is amazing how beautiful it can look over time. 

20 yr old forest garden

Photo Credit : Kootenay Permaculture.

I have also introduced Mason Bees. I will be releasing them as soon as the weather is cooperating. Check out my blog on Mason Bees here.

mason bees emerging cocoons

My little mason bees emerging a little early.

Over the year I will be updating and doing more photos as the forest garden grows. I hope you will follow along to see how things work out. You can find more of my blogs at Experience Nicola Valley.

More Information

If you are looking for more information about creating your own forest garden, the internet is a great place to start. There are many sites full of information on forest gardens and permaculture.

If you’re in the Nicola Valley, there are couple of great places to purchase supplies. Canadian Tire and Purity Feed both have a great selection of trees and plants. 

I also can make garden signs for your garden, walkway or anything you need. You can have a look at my Twisted Turkey Facebook page to see some of my signs and home decor items.

Thank you for taking the time to read my blog and HAPPY GARDENING.

Feature photo credit to The Green Parent – The Edible Forest Garden. Feel free to check out their article here.

How to Create a Forest Garden

Mason Bees

Pollinate using mason bees

How to keep mason bees

Mason bees are a native species of bee that are fantastic at pollinating our fruit trees and gardens. There is a decline of wild and honey bees due to the use of herbicides and parasitic mites. Mason bees are a great and easy way to restore the productivity of your garden.

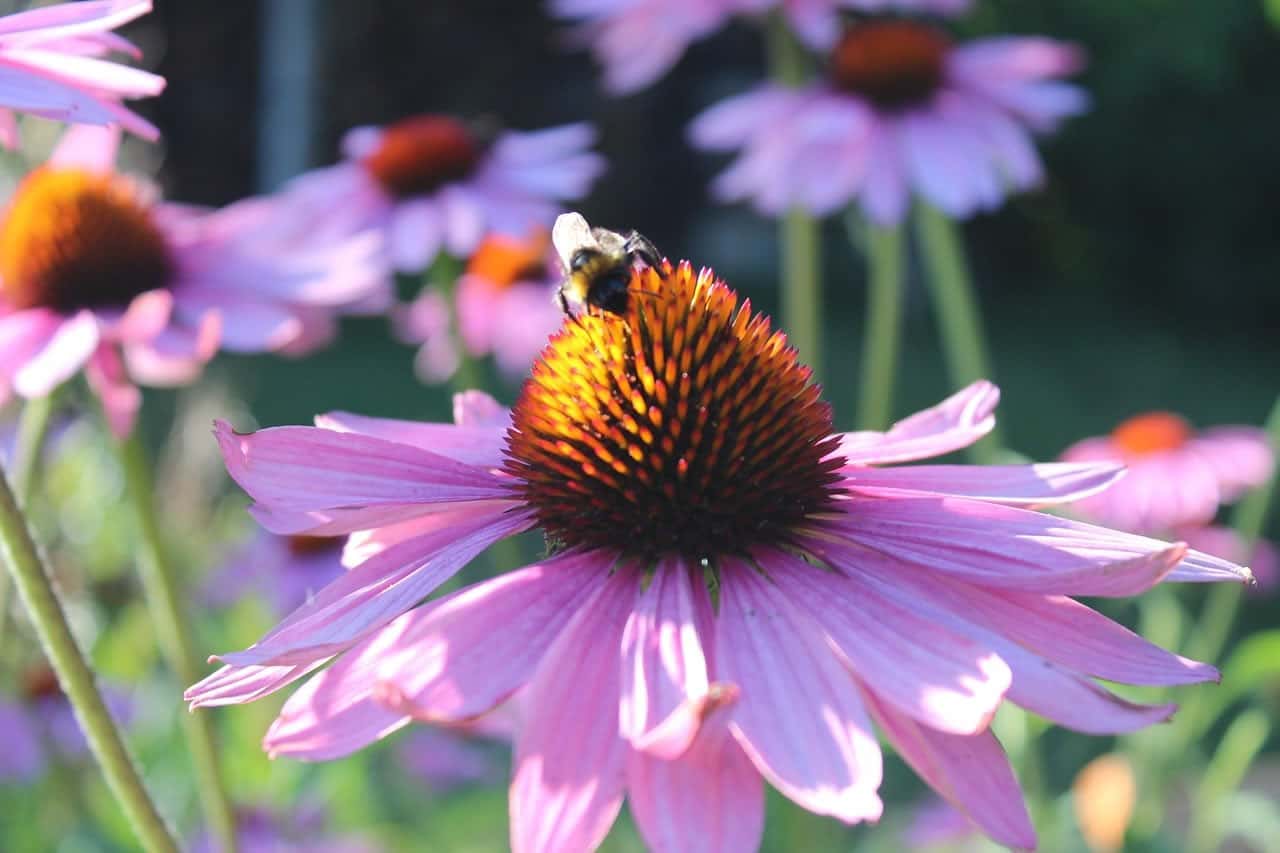
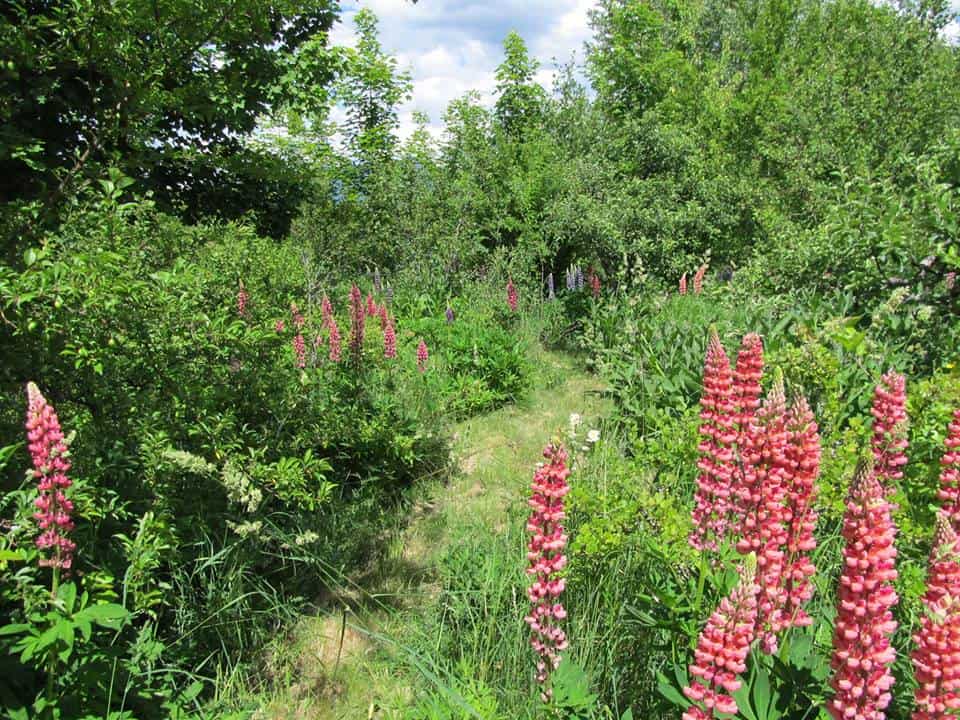
What is Pollination?

Pollen transferred from one flower t another is called pollination. Flowers depend on bees to move pollen from one flower to another thus pollinating them. The bees are rewarded with food to survive and to use for inside the chambers of there eggs.

The more bees there are to pollinate the more abundant the crops will be. It’s quite simple really. More bees equal more the more pollen delivered, equals more fertilization, equals more seeds which equals more fruit and larger fruit. It’s a win, win for everyone.

mason bee pollen

Photo Credit Crownbees

How to tell bees from wasps.

Bees have three body segments, head, thorax and abdomen. The female bee is the only one who can sting. Her abdomen has an oviparous for laying eggs which also serves as a stinger. The male does not have this but has male genitalia instead. Therefore he can not sting. Bees are also covered in tiny little hairs. These hairs are what help the bees to collect and distribute pollen.

Wasps on the other hand only have two body parts, the head and abdomen. They are carnivorous which means they get their protein from meat. They do also look for sugar substances from any source available.

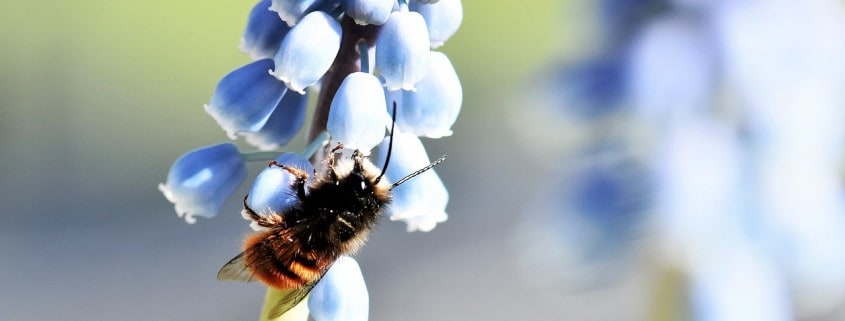
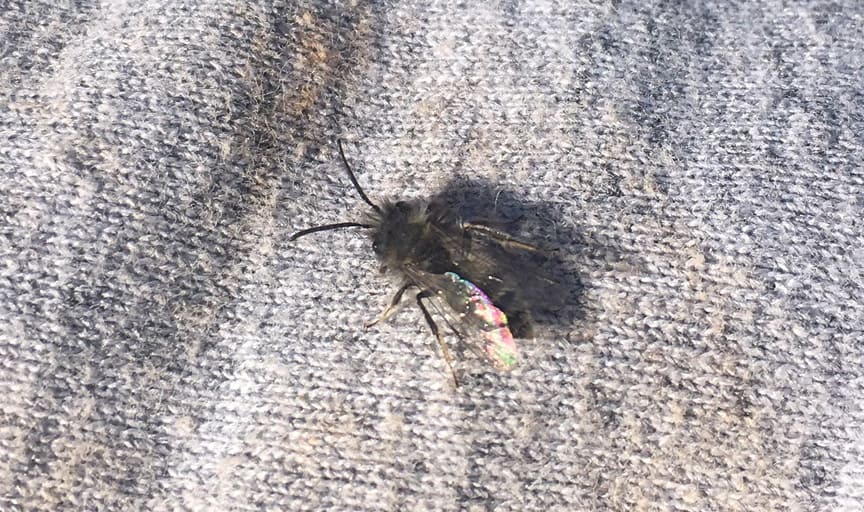
Mason Bee Appearance

Mason Bees look black and like a house fly. But there are a few ways that you can tell them apart from house flies. One way is the antennae. A mason bees’ antennae are segmented.  Another way to tell them apart is that a mason bee has little hairs on it’s body where as a house fly is bare of hairs. You also won’t find mason bees on your food or leftovers or anything that is rotting etc. Mason bees you will find on open flowers in your orchard or garden. 

You can tell the male mason bees apart from they female mason bees by the little tuft of white hairs on its head and up the antennae. Males are also smaller than females. Male mason bees also have antennae that are longer than their heads while female mason bees have smaller antennae. 

mason bee merritt bc canada

Mason bee landed on my finger.

Life of Mason Bees

The mason bees are a solitary bee. Females do not need the aid of a colony to nest ad lay eggs. She finds a nest site and provides everything necessary to ensure the success of her eggs.

Adult mason bees stay in their cocoons over the winter. Once spring arrives, they emerge and have a very busy but short life span of about a month.

Spring time for Mason Bees

Mason Bees are very active once they emerge in the spring. There life consists of mating, producing their offspring and dying. This usually happens anywhere from Feb to May depending on the altitude of where they are living.

Male mason bees will emerge first as they are the last to be layed in the nesting tube. They are so cute with the white hairs on their heads and along their antennae. The males will not stray far from the nest as they wait for the females to emerge.

Once the weather is warm enough, daytime temperatures need to reach 14 degrees Celsius. The females will start to emerge. Male and female mason bees mate as soon as the females emerge. The female then starts looking for a place to lay her eggs and build the nests. 

Nest Site

After the female has found a suitable nesting site, she will go looking for pollen and nectar. While she is collecting the pollen and nectar, she is also pollinating the flowers all around. Once she had enough food the female mason bee will go back to her nest. She places the food down, lays and egg on top and closes the segment off with mud. The female mason bee will continue to do this until either she has layed all her eggs or she dies.

Nest Material

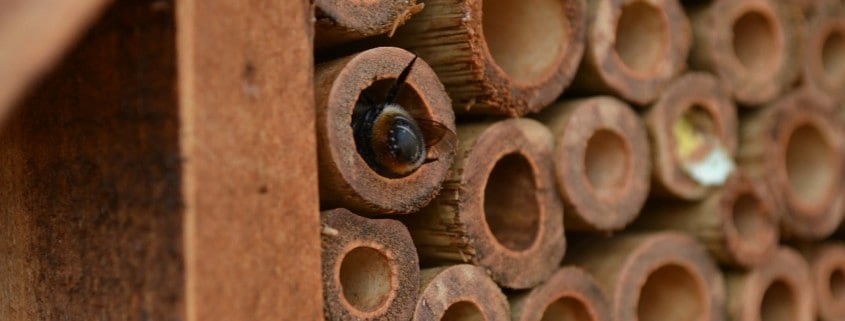
Mason Bees nest in tubes and holes or pretty much anything that has a cylinder shape. If you’d like to make a mason bee house of your own there are a few things to consider. First you need to make sure that the tubes you make are at least 5″-6″ in length and 5/16″ in diameter. This ensures that there is a good ratio of male to female eggs layed. If the tube is too short there will be more male mason bees layed. 

mason bee nesting tubes

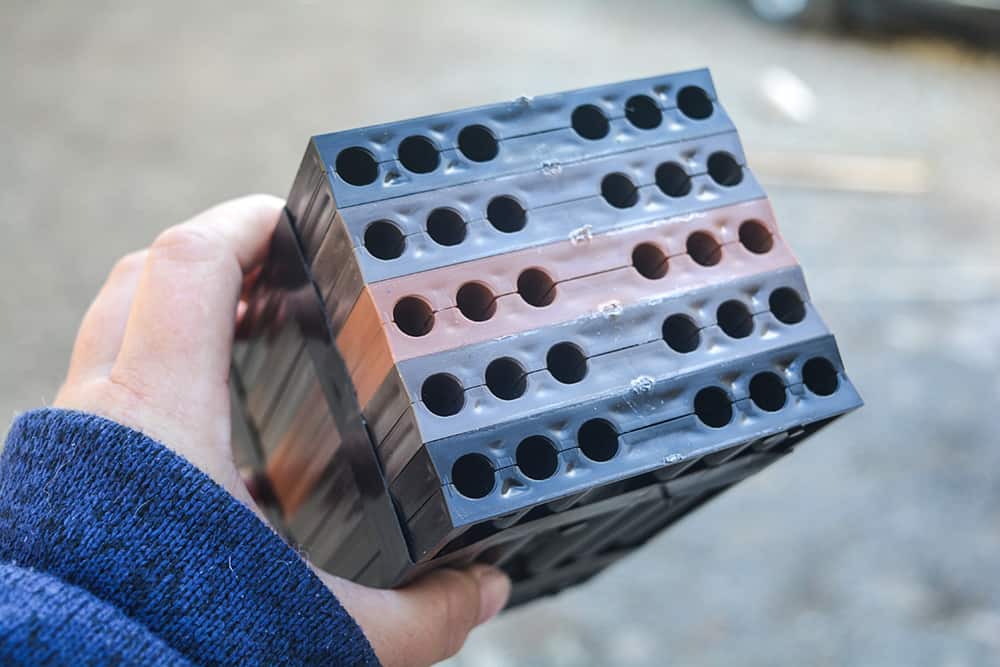
Mason bee tubes. Made from Plastic. Can be taken apart.

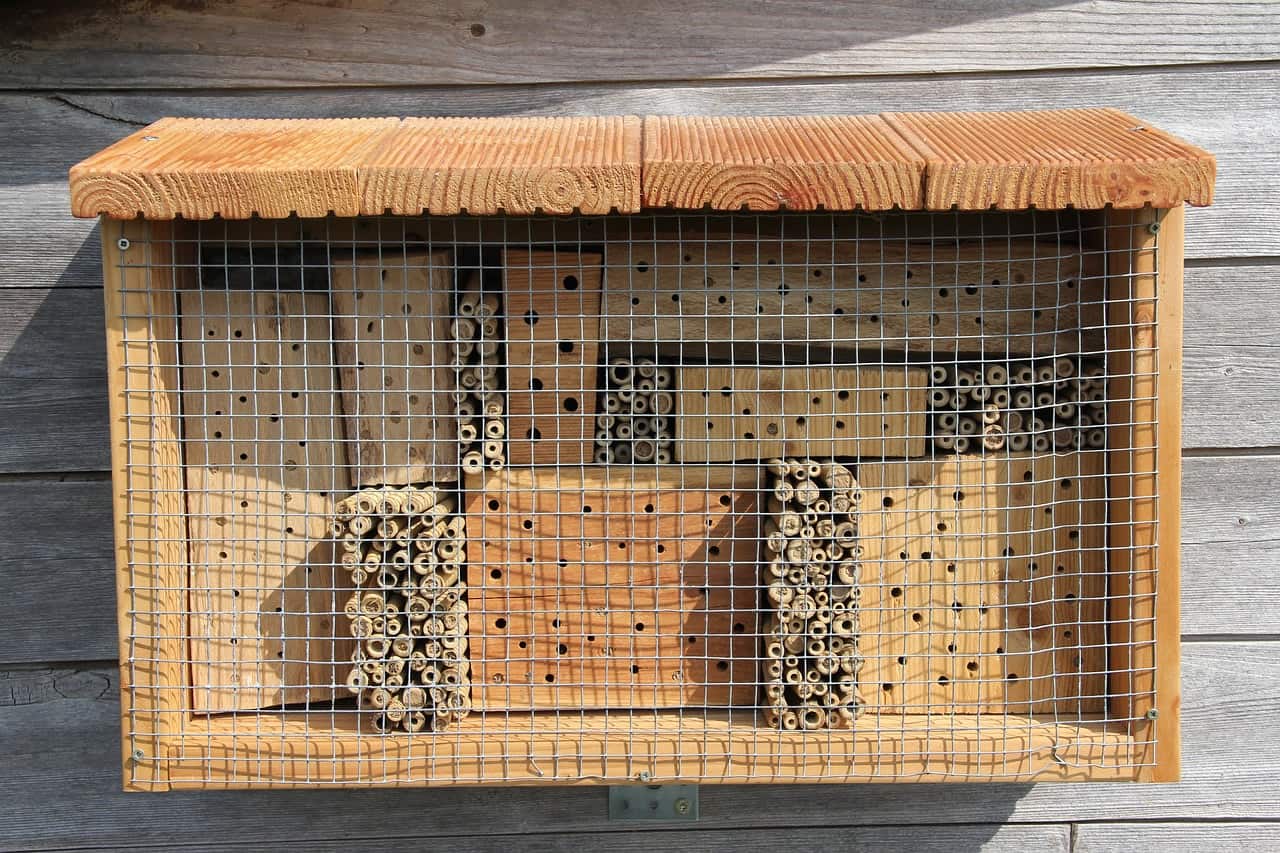
You will want to make sure you place your mason bee house facing east so that it will receive morning sun and get afternoon shade in hotter climates. Ensure that your nest is protected from wind and rain. Very important to make sure there is an area they can get moist clayey mud in a hole in the ground as they need this to close off the sections in their nests and the end of the nest.

In the wild there is a chance for the nest sites to become infected with parasites or destroyed by predators. If we are looking after the nests, we can ensure more bees will survive. By making or buying nest that come apart so they can be cleaned, inspected and kept safe from predators.
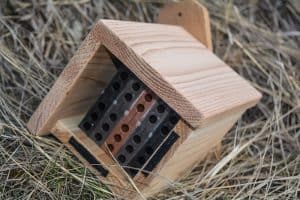
Mason bee home

Mason Bee House

Once the nests are closed

Inside each chamber the egg will hatch, and the larva or grub will feed on the pollen and nectar ball left by the mother. Once the larva has fully grown, they go into a resting stage. The larva then spins a cocoon and changes into a pupa inside the cocoon. By the end of summer, the pupa’s have evolved into adult mason bees. Warmer temperatures will ensure the adults have developed fully. Cooler temperatures may halt growth and even cause death. But if the summer heat is too hot it can also have detrimental effects on the cocoons.

Keep your nests safe

You can also make sure that your nests are kept safe over the summer before harvesting. Once all the holes have been closed with mud you know it’s time. You can take the block of nests and place them inside a special nesting bag. This bag allows air to flow through but will not allow birds and other predators to get in and destroy the nests. You can move them into a shaded place until it’s time to harvest the cocoons in fall.

Retrieving the cocoons

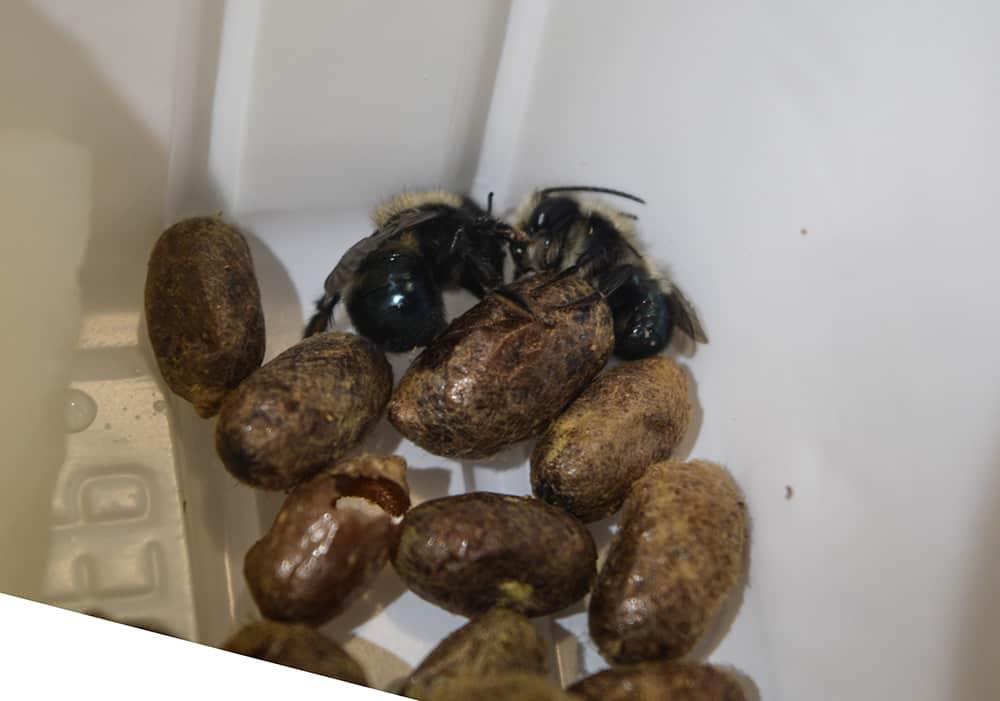
Female and male mason bees remain in their cocoons over the winter. In the fall you will want to retrieve the cocoons from the nests and go over them for parasites or diseases. 

Usually around October it’s time to harvest your mason bee cocoons. How you harvest your nests will depend on which type of nesting materials you used. Carefully take apart, unravel or cut your tubes open. Remove the individual cocoons from the nesting tubes. You can put them aside and wash or discard later. 

Now you will inspect the cocoons for any mold, fungus or parasites. Good cocoons are nice rich brown color and look similar to deer droppings lol. 

Washing your cocoons

Once you have harvested your cocoons you need to wash them. You can do this by taking a 4 L bucket of lukewarm water. Place a layer of cocoons into the water. Gently roll them in the water to help the mud and other debris to fall off. Let the cocoons sit in the water for 20-30 min. Stir them occasionally to remove dirt and ensure they are well whetted. Good cocoons will float. If any sink to the bottom they are no good and can be set aside. 

Mites

You can inspect cocoons for mites. IF there are mites you will want to wash them in a solution of bleach and water. The solution consists of 1 tbsp bleach to 4 L of lukewarm water. Put the effected cocoons into a sieve and lower the sieve and cocoons into the bleach solution. Carefully mix them around to help any mites fall off. After 10 min remove from the bleach solution and put them under warm running water for 5 more min to help rinse of the chlorine. This should have removed any mites or remaining dirt.

Drying your cocoons

Now you are ready to dry your washed, dirt and mite free cocoons. Place a couple layers of paper towel down on the counter. Place your cocoons on the paper towel and cover with more paper towel. After a couple hours you can reinspect your cocoons. 

Inspection

Look under your cocoons for any orange spots on the paper towel. If there are less than 10 per square inch you are good to go, and washing them was successful. If there are more than that you need to screen your cocoons to remove the rest of the mites or as many as you can.

Screening your Mason Bee cocoons

The best way to screen for mites is to use a metal window screen or a metal kitchen sieve. Put the cocoons onto the screen and start rolling them around by gently shaking the screen back and forth. You will want to do this in a place where the mites can fall and be easily cleaned up, like over a bathtub. Once you have rolled the mason bees cocoons around on the screen for about 60 seconds you can put them back on replaced paper towel for another hour. Rolling the cocoons around on the metal heats them up a bit and causes the mites to fall off. Now they are ready to be stored and inspected for mason bees or wasps. 

Inspecting for wasps

The easiest way to inspect your mason bee cocoons for wasps is to candle them. Take a flash light with a lip, place enough cocoons on the glass plate to cover it. Make sure you are in a dark room. Turn the flashlight on. In the cocoons that contain mason bees you will be able to see the little bee in a fetal position. If the cocoon is transparent then you know the cocoon is questionable. Do not leave the cocoons on the light for more than a min as it can dry out the cocoon and may kill the bee.

Unsure if the cocoon is good?

IF you are not sure when you candle or check over your mason bee cocoons. You can take those and store them in a separate container for the winter. In the spring warm up the cocoons and watch what emerges. If its a mason bee, cool it off in the fridge until the outside temp is warm enough to release. If it is something else that emerges destroy it. 

Storing cocoons over winter

There are special coolers that you can purchase to house mason bee cocoons. They have a space for your cocoons and a space for a wet towel to help keep the humidity correct. There are also air holes to make sure they have adequate air circulation. You can also use a cardboard box with paper towel on the bottom to cushion the cocoons. Make sure there are holes in what ever container you decide on. Once you have them snug in their container the best place to store them in in the refrigerator. Manual defrost fridges are more humid than frost free. Therefore, are best for keeping mason bee cocoons. If you have a frost-free fridge keep an eye on your cocoons. Sometimes males will emerge while in the fridge. 

If any bees emerge while in the fridge don’t panic. I had some emerge and created a cotton ball with equal parts water and sugar and put it into the container, so the emerged bees had something to eat. Once the weather is warm enough and there is enough food outside you can release them along with the other cocoons.

mason bees emerging cocoons

My little mason bees emerging a little early.

Spring Emergence 

The easiest way to tell if it’s time to release your bees is wen the temperature outside is a steady 15 degrees Celsius and there are flowers on your apple tree. If you don’t have apple trees just make sure there are blossoms of some kind close to where you have set up your nesting area. Place the cocoons adjacent to or in the nest site.

Make sure the ground underneath your nesting site is not too wet or has any puddles and the newly emerging bees can fall and will drown. Best way is to release in batches every 4-7 days. This way if the weather turns bad you won’t lose all of your bees.

Bees need full sun and early as possible in the morning. There bodies need to warm to 90 F in order to be able to fly. They like to be out early to avoid the afternoon heat.

mason bee warming in the sun

Mason Bee from Merritt BC Canada warming up in the sun

Fascinating to watch

Mason bees are so fascinating. They are social bees and are so easy to watch. Make a mud area where you and the family can enjoy watching the females collect mud to wall off each section of their nests. You can also go out early in the morning to check out the bees sitting in the opening of their nests. They really are quite cute. There are nest boxes you can purchase that allow you to watch each stage of the mason bee’s life. 

Conclusion

Mason bees are only on species of bee that are so important to our environment. Do your part by not using pesticides. Plant native wild flowers. Grow and harvest your own mason bees. So easy, so fun and so rewarding.

Thank you for taking the time to read my blog on Mason bees. Interested in learning more? Please feel free to contact me or check out my other blogs on bees at Experience Nicola Valley

If you would like to purchase some supplies and mason bee cocoons you can check on the internet. If you live in the Merritt or Nicola Valley area you can contact our local supplier Ellen Miller from Miller’s Farm in Lower Nicola. They also put on beekeeping courses and other seminars, including a mason bee seminar.

Photo Credit

Feature image of mason bee on the purple flower taken by Rusty Burlew of Honey Bee Suite. Stop by her website to check out all the great things she has to offer. 

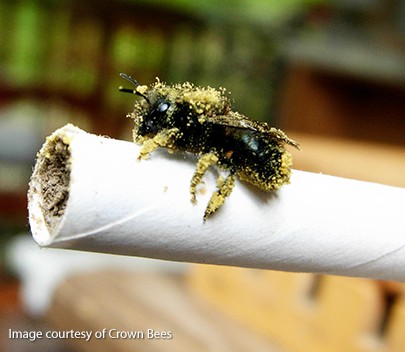
Photo of mason bee on the nesting tube covered in pollen courtesy of CrownBees. They also have a wonderful website with lots of great information.

Mason Bees – Merritt BC Canada

Nicola Valley Community Garden Society

Gardening in the Nicola Valley

“To plant a garden is to believe in tomorrow” Audrey Hepburn

Since 2012 when the Nicola Valley Community Garden Society came about by a group of friends who had a passion for gardening. They have wanted to continue to share that passion with their community.

Nicola Valley Community Garden has since become a place for members to share their expertise year after year with new gardeners and the community. Besides putting on different events and talks throughout the year, members also help each other with day-to-day tending when needed. 


gardening community garden bees growing food

Photo Credit – Nicola Valley Community Garden


Most importantly its a place where you can grow a garden with help from other members.  Whether you are new to gardening or an expert, young or old there is something for you. A few things they offer;

Plot Support

  • Compost sharing
  • Seed sharing
  • Joint Watering
  • Garden Mentoring
  • New to Gardening? They can help you get started.

Although its in a community setting the benefits can be astounding. Being in a community plot allows you to learn as you grow and it also allows you to help others along the way. It really is a win win situation.

First of all a garden is a place where you can slow down and take in the tranquility of your surroundings. Be sure to take a look at the little things while you’re gardening. Enjoy teaching your children how to grow their own nutritious food. Harvesting what you grow is so rewarding. Besides, I think there is nothing quite as soothing as digging in the dirt and nothing quite as rewarding as watching those little seeds come through the earth. As well as growing to become food on our plates.

growing food, community garden, garden plot, vegitables

Photo Credit – Nicola Valley Community Gardens

Few of the Past Functions

Every year the Nicola Valley Community Garden Society hosts a few exciting functions. Below are a few of the past functions held at the gardens.

Past Events

  • Salsa Fest. Although no longer run, this event was meant to be a community celebration. To share the wonderful produce available in the area or grown by the gardeners. It was a great opportunity to do a bit of fundraising. Fundraising helped ensure the organization and garden was sustainable into the future. The salsa competition was held on Aug 15, 2015. It was an exciting event that hosted 8 competitors and 3 judges. The attendees were also treated to a salsa dance lesson as well as delightful taste experiences. Wouldn’t be fun to have this event again?
  • Harvest Potluck. Again an older event, this was held on one day in the fall. Gardeners would all share their harvest with fellow members. What a great idea as not every one may want to grow the same things. Being able to share your bounty with others was a great benefit.
  • Yoga in the Garden. This event was held in the garden over the summer. Becoming a popular peaceful way to spend an hour. The Community Garden is looking at possibly reintroducing this. In order to do this they would need volunteers to help set it up and run it. If your interested contact the Nicola Valley Community Garden Society. 

And a couple more past talks

  • Compost and sq ft garden. There isn’t a lot known about this at the moment. They were talks they held once a month. Different subjects  discussed around composting and sq ft. gardening.
  • Earth ships by Sarah Molnar. Seems like a very interesting talk about combining your living space with your growing space and all the benefits you can rep by doing this.
  • Adventures in Permaculture with Julia Ghog and Mike Ebenal. While this talk featured three examples of experimental gardening using permaculture principles. The hugelkultur, the herb mound and the no-weed raised garden beds. It would also be interesting to learn other permaculture gardening ideas, for instance forest gardening.

Nicola Valley Community Garden  has a number of great events coming up in 2019. Be sure to check out NVCGS on Facebook or follow me at Experience Nicola Valley to read about whats going on past and present.

vegetables, good food, growing food

Photo credit – Nicola Valley Community Garden

Nicola Valley Community Garden’s Mission Statement

  • Facilitate and cooperate in the development of a sustainable food system for residents of the Nicola Valley.
  • Support the development of a network of community.
  • Encourage education in gardening; nutritional well-being and food security.
  • Engage seniors in the community mentoring of others.

Wondering how can you become involved? Check out a few options below. 

Support

Besides becoming an associate member of the NVCGS, which will help show that what they strive to do is important. And as a result this helps them generate funds to keep going. Whether you are gardening or interested in giving talks, there is always a way you can help support them.

Finally it promotes a sense of pride in our Community. As we work towards healthier lifestyles and food sustainability for all.

Upcoming events

In Conclusion here are some upcoming events for March

  • March 8th – 12-6 pm – NVIT
    Table at Food Connection Event
  • March 19th 6:30-7:30 Earthwalker Spiritual Shop
    Caring for House Plants and tropicals guest speaker
  • March 23rd – 10-4 – Civic Center
    Table at Nonprofit fair
  • March 30th 10-4 Civic Center
    1 o’clock talk about benefits of gardening @ Woman’s Fair

Contact

Nicola valley Community Gardens can be found on;

  • FaceBook
  • Instagram
  • email: nicolavalleycommunitygardens@gamil.com
  • Telephone: Alycia at – 604-833-8761

Nicola Valley Community Garden Society